2026 Best Tools for Changing a Vinyl Liner Pool Light?

Time:2026-10-03 Author:Sophia
0%

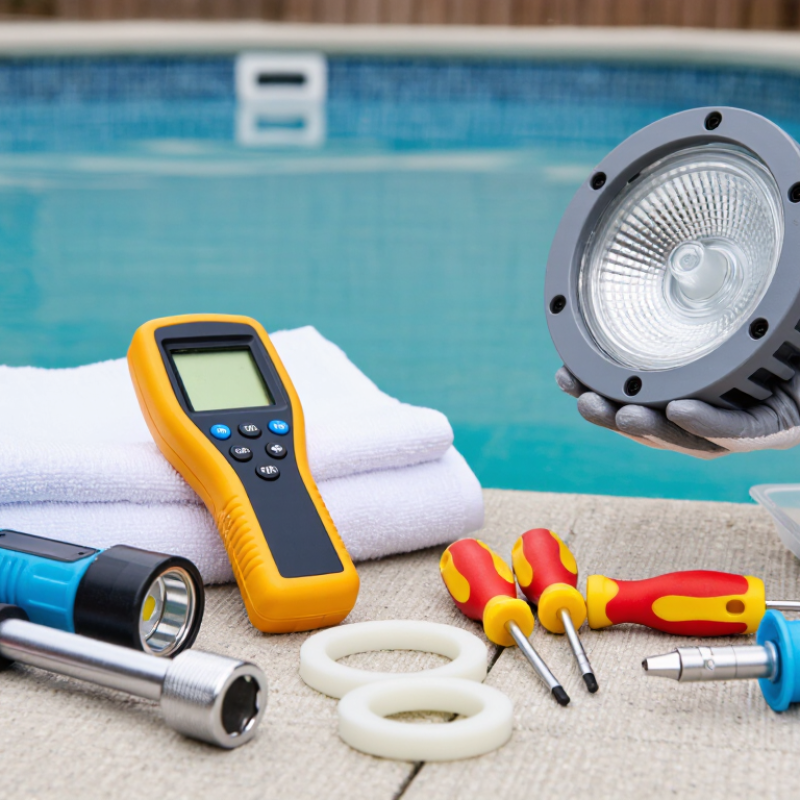
Changing a vinyl liner pool light looks simple until water, electricity, and a delicate liner meet. This guide to the 2026 Best Tools for Changing a Vinyl Liner Pool Light focuses on practical equipment, not flashy gadgets. The right tools include a non-contact voltage tester, insulated screwdrivers, a nut driver, replacement gasket, clean towels, and a low-voltage inspection light. A small plastic trim tool can help protect the liner. Metal tools can leave ugly scratches.

Pool-industry educator Rudy Stankowitz offers a useful safety reminder: “Treat every pool light as energized until testing proves otherwise.” That warning should shape the entire job. Turn off the correct breaker, test the circuit, and confirm the light remains powerless before touching any fastener. Never rely only on a wall switch. It feels safe, but feeling safe is not proof.

The best tool is often patience. A second person can hold the fixture while you guide the cable onto the deck. Keep screws in a shallow tray, because one dropped screw can disappear beneath wet equipment. Inspect the niche, gasket, cable, and lens before installing anything. A damaged seal may require professional attention. That part is easy to underestimate.

This article answers what tools are needed to change a vinyl liner pool light while comparing tool quality, handling, and real job-site usefulness. Some kits look complete but omit the voltage tester. That is a serious weakness. Even experienced owners can miss a step when the pool deck is wet. Take photos before removal, follow the manufacturer’s instructions, and stop when the installation does not feel fully controlled.

2026 Best Tools for Changing a Vinyl Liner Pool Light?

Understanding Vinyl Liner Pool Light Systems and Safety Requirements

Changing a vinyl liner pool light requires more than choosing a bright replacement fixture. The system usually includes a wet niche, face ring, gasket, cord, conduit, junction box, and protective grounding. The vinyl liner must remain flat and sealed around the niche. A damaged gasket can allow water behind the liner, causing wrinkles, stains, or structural problems.

Safety comes first. Turn off the correct circuit breaker, then verify isolation with a properly rated tester. Never rely only on the light switch. Pool lighting circuits require grounding, bonding, and often ground-fault protection under local electrical rules. These protections are not interchangeable. A qualified pool electrician should inspect the junction box, cord condition, bonding connection, and replacement compatibility. Even a small installation error can create a serious shock hazard. Some guides make this work look simple, but that view is incomplete.

Tips: Keep the light face supported while removing screws. Use a new, compatible gasket rather than reusing a flattened one. Clean the sealing surface gently; sharp tools can cut the vinyl liner. Photograph wire connections before disassembly, but do not trust photographs instead of testing. If water appears inside the fixture, stop. My cautious preference is to replace questionable hardware, although this may cost more and feel unnecessary. A dry test outside the pool can reveal problems, but final electrical checks should follow local requirements.

Essential Tools for Removing and Replacing a Pool Light

Changing a Vinyl Liner Pool Light: Essential Tools for Removing and Replacing a Pool Light

Replacing a pool light requires more than a screwdriver. Gather a non-contact voltage tester, insulated screwdrivers, a socket set, and a clean towel. You may also need a replacement gasket, waterproof cable lubricant, and a soft plastic scraper.

A bucket keeps small screws from disappearing around the pool deck.

Switch off the circuit at the breaker and verify that power is absent with the voltage tester. Never trust the wall switch alone.

Remove the light fixture screw, then ease the fixture from its niche without pulling hard on the cable. Place it on the towel. Inspect the gasket, lens, cable entry, and niche for cracks, corrosion, or trapped debris.

A damaged seal can let water reach the electrical connection. That is not a minor issue.

If the cable is short, brittle, or damaged, stop and contact a qualified pool electrician.

Tips:

Photograph the wiring before removal.

Keep the screw dry and nearby.

Clean the gasket groove carefully, but avoid sharp metal tools near the vinyl liner.

Apply only the lubricant recommended for the gasket material.

Test the replacement light outside the water only when the manufacturer’s instructions allow it.

I once rushed a similar repair and missed a twisted gasket; the light worked, but the seal failed later. Slow work is usually safer.

Check local electrical requirements before restoring power.

How to Choose the Best Tools for Vinyl Liner Pool Light Work

2026 Best Tools for Changing a Vinyl Liner Pool Light

How to Choose the Best Tools for Vinyl Liner Pool Light Work

Choosing tools for vinyl liner pool light work starts with protecting two things: the electrical system and the liner. Use a non-marring plastic pry tool, a correctly sized screwdriver, and a shallow tray for screws. Plastic tools reduce scratches around the faceplate. A magnetic pickup tool can help, but keep it away from exposed electrical parts. Small parts disappear quickly.

Check the light’s fastener type before opening the housing. Some fixtures need a hex key, while others use slotted or Phillips screws. The replacement gasket must match the fixture’s shape and dimensions. Never reuse a flattened gasket. It may look acceptable, but water can enter later. Keep a clean towel nearby, because grit under the gasket can create a slow leak.

Safety matters more than speed. Turn off the circuit at the electrical panel, lock it out when possible, and verify the absence of power using properly rated test equipment. Do not rely on the wall switch alone. Pool electrical systems require careful handling, and a qualified electrician should manage testing or wiring repairs. I once focused too much on removing a stubborn screw and nearly dragged the liner against the tool. That was a useful reminder: access, lighting, and patience matter as much as tool quality. A headlamp helps. So does stopping early.

2026 Best Tools for Changing a Vinyl Liner Pool Light

How to Choose the Best Tools for Vinyl Liner Pool Light Work

The planning score reflects how important each item is during a typical vinyl liner pool light replacement. Electrical verification and insulated hand tools receive the highest priority, while towels and a clean cloth help protect the liner, gasket, and work area from moisture and debris.

Step-by-Step Process for Changing a Vinyl Liner Pool Light

Changing a Vinyl Liner Pool Light: A Step-by-Step Process

Before touching the light, switch off the pool circuit at the breaker. Test the circuit with an approved voltage tester, and confirm the light cannot turn on. Never rely on the wall switch alone. Remove the retaining screw with the correct screwdriver, then gently pull the fixture onto the pool deck. Keep the cord supported and avoid dragging it across the vinyl liner. If the cord feels tight, stop and inspect the installation.

Check whether the fixture uses a replaceable bulb or a sealed light unit. Follow the manufacturer’s instructions for the correct replacement, gasket, and lens position. A damaged gasket can allow water inside, so replace it rather than reusing an old one. Clean the sealing surfaces with a soft, lint-free cloth. Do not use sharp tools near the liner or niche. I have found that rushing this small cleaning step creates bigger problems later. That is an easy mistake.

Tips: Photograph the wiring before disconnecting anything. Keep screws in a small container. Inspect the niche for corrosion or loose parts. If the light shows moisture, damaged wiring, or an unclear connection, contact a qualified pool electrician. After installation, place the fixture back carefully, tighten the screw evenly, and restore power only after the area is clear. Test the light briefly, then check for flickering, unusual heat, or water entering the housing.

2026 Best Tools for Changing a Vinyl Liner Pool Light? - Step-by-Step Process for Changing a Vinyl Liner Pool Light

Stage Recommended Tool or Material Purpose Key Specification or Requirement Estimated Time
1. Verify the replacement Replacement underwater pool-light assembly or sealed lamp unit Ensures the new light fits the existing niche and electrical system Match voltage, niche style, cord length, gasket type, and listed pool-light compatibility before purchase 10–20 minutes
2. Shut off power Electrical-panel breaker and non-contact voltage tester Prevents electrical shock during removal and installation Turn off the correct breaker and verify that the light cannot operate; never rely only on the wall switch 5–10 minutes
3. Prepare access Pool-light screwdriver or correctly sized stainless-steel screwdriver Removes the retaining screw from the light face ring Use the exact drive type and size to avoid stripping the screw or damaging the trim ring 5 minutes
4. Remove the old light Plastic trim tool, suction cup, or clean flat tool; soft towel Helps lift the fixture gently and protects the vinyl liner and pool wall Avoid sharp metal edges, prying against the liner, or pulling sharply on the cable 10–15 minutes
5. Inspect the niche Waterproof flashlight and clean, lint-free cloth Checks for corrosion, debris, damaged threads, or water intrusion Stop if the niche, conduit, bonding connection, or cable insulation appears damaged 5–10 minutes
6. Replace the seal New manufacturer-specified gasket or O-ring Creates the water-resistant seal around the lens or lamp housing Use a new, correctly sized seal; do not reuse a flattened, cracked, or stretched gasket 5–10 minutes
7. Install the new light Replacement fixture, retaining screw, and compatible gasket Secures the light evenly in the niche Keep the cable behind the fixture without pinching it; tighten the screw evenly and only to the specified torque 10–20 minutes
8. Test before normal use Dry cloth, circuit-breaker reset, and visual inspection Confirms correct operation and checks for visible leaks or movement Restore power only after the fixture is secured; test briefly and inspect the seal and lens 5–10 minutes
9. Final safety check Electrical inspection by a qualified pool electrician Verifies bonding, grounding, GFCI protection, and local-code compliance Recommended whenever wiring, the junction box, conduit, bonding, or supply voltage is uncertain Varies by installation
Important safety note: Underwater pool-light circuits can be hazardous even when the light switch is off. Disconnect power at the breaker, verify the circuit is de-energized, and use a qualified electrician when the wiring, grounding, bonding, GFCI protection, or fixture compatibility is uncertain.

Safety Checks and Testing After Installing the New Pool Light

Safety Checks and Testing After Installing the New Pool Light

After installing a vinyl liner pool light, keep the circuit switched off at the breaker. Confirm the wires are de-energized with a suitable voltage tester. Never trust the wall switch alone. Check that the grounding and bonding connections are secure, dry, and properly fitted. A qualified electrician should inspect uncertain wiring. The replacement gasket must sit evenly without twists or pinches. Even a small fold can allow water behind the liner.

Restore power only after the housing is sealed and the light is fully submerged, if the fixture requires submersion for cooling. Test the ground-fault protection device before operating the light. Watch for nuisance tripping, flickering, unusual heat, or water movement near the housing. Turn the power off immediately if anything seems wrong. A bright lamp does not prove the installation is safe. I would not rely on appearance alone, because hidden moisture can take time to appear.

Tips: Clean the niche before fitting the new gasket. Photograph the wiring before removal. Check cable strain relief and screw tightness by hand. Avoid over-tightening, which may distort the seal. Let the light run briefly, then inspect the liner and housing again. I sometimes repeat this check later, because the first test can miss a slow leak. Record the test date and any unusual behavior for future inspections.

FAQS

What tools are needed to replace a vinyl liner pool light?

Gather a non-contact voltage tester, insulated screwdrivers, and a socket set. Keep a clean towel, small screw tray, plastic scraper, and replacement gasket nearby. A headlamp helps.

How can I make sure the pool light has no power?

Switch off the circuit at the electrical panel. Test the circuit with a properly rated voltage tester. Never trust the wall switch alone.

How should I remove the light fixture?

Remove the retaining screw with the correctly sized screwdriver. Gently lift the fixture onto a towel. Do not pull hard or drag the cable across the liner.

What should I inspect after removing the pool light?

Check the gasket, lens, cable entry, and niche for cracks or corrosion. Remove trapped grit with a soft, lint-free cloth. A damaged seal needs replacement.

Can I reuse the old pool light gasket?

Reuse is risky. Replace any flattened, cracked, or distorted gasket with one matching the fixture’s shape and dimensions. Apply only compatible lubricant.

How can I protect the vinyl liner during this repair?

Use a soft plastic pry tool instead of sharp metal tools. Support the fixture on a clean towel. Small scratches can become larger problems later.

What should I do if the cable is short or damaged?

Stop the repair. Do not pull, splice, or force the cable. Contact a qualified pool electrician for testing or wiring repairs.

How should I test the replacement light?

Follow the light’s installation instructions and confirm the fixture is seated evenly. Restore power only after the area is clear. Test briefly for flickering, unusual heat, or water entry.

What common mistake can happen during pool light replacement?

A twisted gasket may allow water inside, even when the light initially works. I once rushed this step. The seal failed later. Slow cleaning is worth the extra minute.

Conclusion

Changing a vinyl liner pool light requires careful planning, the right equipment, and strict attention to electrical and water safety. The key question is: what tools are needed to change a vinyl liner pool light? Typical essentials include a compatible replacement light, insulated screwdrivers, a non-contact voltage tester, waterproof connectors, cable-pulling tools, clean towels, and equipment for securing or inspecting the light niche and gasket. The tools should be selected according to the fixture design, pool structure, and manufacturer’s installation instructions.

The process begins by switching off and confirming power isolation at the circuit protection panel, then removing the light carefully without damaging the vinyl liner, niche, cord, or sealing components. After checking the housing and connections, the replacement light can be positioned securely with a properly seated gasket and protected wiring. Once installation is complete, inspect for movement, water entry, loose parts, or liner damage. Restore power only after the area is clear, and test the light while confirming that the circuit protection system operates correctly.

Sophia

Sophia

Sophia is a dedicated marketing professional with an exceptional depth of knowledge about her company's products and services. With a keen understanding of market trends and customer needs, she crafts insightful blog posts that not only inform but also engage readers, enriching the company’s online......