Choosing the right wire-concealment method can protect swimmers, equipment, and the pool shell. It also improves the finished appearance.
This guide examines China’s top ten solutions for hiding wires behind surface-mounted pool lights. It focuses on fiberglass pools, where drilling, sealing, and cable routing require extra care. Readers searching for how to hide wires for surface mounted fiberglass pool lights need more than attractive installation photos. They need evidence, compatible materials, and clear safety checks.
The U.S. Consumer Product Safety Commission’s 2023 Pool or Spa Submersion report states that children under five represent about 75% of reported child drowning fatalities. Exposed cables can create snagging, trip, or maintenance risks near the pool edge. The CDC also reports roughly 4,000 fatal unintentional drownings annually in the United States. These figures make tidy installation a safety concern, not merely a design preference.
Relevant standards deserve attention. NFPA 70, National Electrical Code, Article 680 addresses electrical systems around pools. UL 676 covers electric pool and spa luminaires. PHTA standards also emphasize bonding, grounding, and proper equipment installation. Local requirements may differ.
Small details matter.
The comparison considers surface raceways, protective conduit, recessed channels, adhesive covers, and concealed deck routes. It also reviews fiberglass compatibility, UV resistance, waterproof fittings, repair access, and installation cost. Some methods look excellent at first but fail under heat, chlorine, or repeated servicing. That is my concern. A hidden wire is not automatically a safe wire. Professional inspection remains essential before energizing any pool-light circuit.
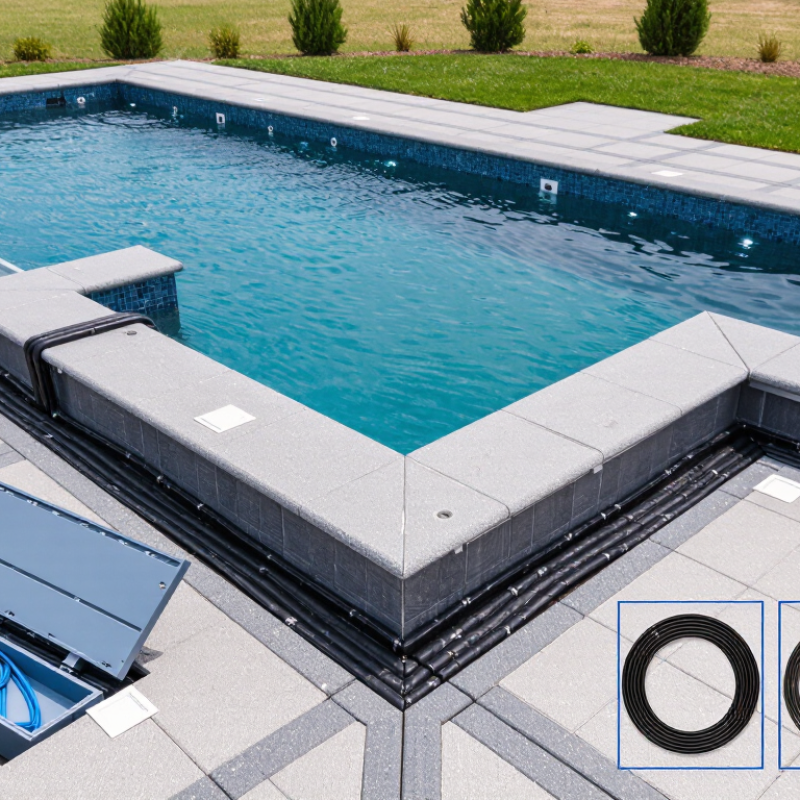
Hidden wires for surface-mounted pool lights are not truly wire-free. They are power cables routed discreetly behind the light body, through a wall, or beneath the pool deck. The cable usually travels inside approved conduit toward a dry junction box. From the pool edge, only the compact light housing remains visible. This arrangement creates a cleaner pool wall and reduces exposed cable loops. However, the phrase “hidden wire” can be misleading. A concealed cable still needs careful inspection and future access.
Tips: Confirm the cable route before drilling. Keep every connection outside wet areas. Use sealed fittings and suitable low-voltage equipment. Switch off power before any inspection. A neat installation is not automatically a safe one.
During installation, measure the cable path twice. Leave a small service loop near the junction box. That extra length helps future testing and replacement. The conduit should avoid sharp bends, hot surfaces, and areas likely to shift. In practice, poor routing causes more trouble than the light itself. I would also photograph the completed path before covering the wall or deck. This simple record prevents guesswork later. Local electrical requirements still control the final design, so a qualified professional should verify grounding, transformer placement, sealing, and testing. Some projects look finished too early. That is where planning sometimes fails.
Comparing China’s top ten hidden-wire pool light solutions requires more than checking appearance. Examine how each design routes the cable behind the mounting plate or through a narrow wall channel. A clean installation should leave no loose wire beside the pool. Ask for installation drawings, cable-gland details, and sealing instructions before making a decision.
In my experience, waterproofing separates a reliable system from an attractive one. Check the light’s IP rating, gasket material, screw quality, and cable entry position. The housing should resist chlorine, moisture, and repeated temperature changes. Low-voltage operation is usually easier to manage, but the transformer still needs protection and correct ventilation. Request independent test documents when available. Product claims alone are not enough.
Maintenance also deserves attention. Can a technician remove the front cover without draining the pool? Is the cable replaceable, or permanently sealed inside the fitting? Compare mounting depth, wall compatibility, beam angle, brightness, and heat control. A narrow concrete ledge may need a different cable route than a tiled wall. Test the sample underwater before approving a large order. That step can reveal glare, uneven sealing, or awkward access. I once underestimated service space around a mounting plate; the installation looked excellent, but later adjustments became frustrating. A hidden wire is useful only when it remains reachable.
Surface-mounted pool lights can look neat when their wiring disappears into a planned pathway. In real installations, installers often use low-voltage cable inside rigid PVC conduit. The conduit protects wires from moisture, pool chemicals, and accidental impact. UV-resistant PVC or UV-stable polymer performs better near bright outdoor surfaces. Flexible conduit helps around curves, but it may look less orderly when poorly supported.
The light housing also matters. Marine-grade stainless steel resists corrosion, while reinforced ABS or polycarbonate can reduce weight and cost. Silicone gaskets, resin-sealed cable entries, and compression fittings help prevent water movement through small openings. Flush cable channels can hide wires along the wall, while compact junction boxes keep connections accessible for inspection. However, fully sealed designs are not always easier to repair. That trade-off deserves attention.
Tips: Keep cable routes short, straight, and visible during installation. Leave a small service loop behind each light. Use certified low-voltage equipment and follow local pool electrical codes. A qualified electrician should test insulation, grounding, and waterproof connections before use. Do not bury a connection simply to improve appearance. It may create a maintenance problem later. Even attractive installations can fail when drainage, heat, or chemical exposure is underestimated.
Surface-mounted pool lights look neat only when their wiring is planned before installation. Mark the light position, cable route, junction point, and power source first. Keep the route short and accessible. Do not simply bury loose cable beneath tiles or soil.
Switch off the circuit, then verify isolation with a tested meter. Follow the light manufacturer’s voltage and cable requirements. Install the cable inside approved waterproof conduit, using smooth bends and sealed entries. Leave a small service loop behind the fixture. This makes future inspection possible. It also prevents tension at the terminals. Use a listed junction box outside the pool’s restricted zones, and connect protective grounding as required by NFPA 70 Article 680 or IEC 60364-7-702.
A concealed deck channel can hide conduit beside the pool coping. For existing concrete, a narrow surface raceway may be safer than aggressive cutting. Match its cover to the surrounding finish. Keep connectors above possible standing water and protect them from chemical exposure. The U.S. Consumer Product Safety Commission’s 2023 pool submersion report recorded an average of 358 fatal child drownings annually among children under 15 during 2018–2020. That figure concerns drowning, not wiring, but it reinforces disciplined access control. In practice, installers sometimes leave cable routes too tight. I have seen this cause cracked glands and difficult repairs. Allow room for inspection. Test insulation, grounding, residual-current protection, and light operation before refilling or sealing any channel. Local electrical rules still control the final installation.
When comparing hidden-wire solutions for surface-mounted pool lights, safety must lead the design. The U.S. Consumer Product Safety Commission recorded an average of 371 fatal child drownings and 6,400 emergency-department injuries annually in recent pool reports. Wiring cannot prevent drowning, but reliable lighting improves visibility around steps, edges, and ladders. Installers should use wet-location-rated cables, suitable conduit, and correctly sized low-voltage transformers. NFPA 70, 2023 edition, addresses GFCI protection, bonding, and clearances in Article 680. Local requirements may be stricter.
Compatibility is often overlooked. A light designed for 12 volts should not share a transformer with incompatible equipment. Calculate voltage drop across the full cable length, especially beside large pools. Use sealed, accessible junction boxes above splash zones. IP68 protection helps, but it does not automatically certify every connector for permanent immersion. Check the complete assembly.
Maintenance decides whether a neat installation remains safe. Leave service loops near each light, label cable routes, and avoid burying splices under tile or concrete. Inspect connectors for green corrosion, brittle insulation, and moisture every season. One mistake remains easy to miss. A hidden cable can look perfect while its terminal loosens behind the wall. Technicians should test GFCI operation and insulation condition with suitable instruments. I would also question purely concealed designs; a removable cover may look less elegant, but it can shorten repairs and reduce future damage. Data referenced: U.S. CPSC Pool or Spa Submersion Report, 2023; NFPA 70, National Electrical Code, 2023.
It does not mean wire-free. The cable runs behind the housing, through a wall, or beneath the deck. Only the light body remains visible.
Keep every connection outside wet areas and above splash zones. Use sealed, accessible junction boxes. Hidden does not mean unreachable.
Measure the route twice before drilling. Avoid sharp bends, hot surfaces, and shifting areas. Leave a small service loop near the junction box.
Check the IP rating, gasket material, cable entry, screw quality, and sealing instructions. IP68 helps, but it does not approve every connector for immersion.
Match the light voltage with a suitable low-voltage transformer. Calculate voltage drop across the entire cable length. Similar-looking equipment may still be incompatible.
A technician should remove the cover without draining the pool. Keep splices accessible and label cable routes. Access matters.
Look for green corrosion, brittle insulation, loose terminals, and moisture. Test GFCI operation and insulation condition with suitable instruments. One hidden fault can remain invisible.
Yes. Test a sample underwater first. Check glare, beam coverage, sealing, brightness, and access around the mounting plate. Test before ordering.
Usually, it looks cleaner and reduces exposed cable loops. However, a removable cover may look less elegant and simplify repairs. I would not sacrifice access for appearance.
This guide explains how hidden-wire systems improve the appearance, safety, and durability of surface-mounted pool lights, especially in fiberglass pools. It compares ten leading solution types from China by evaluating wire-routing methods, housing designs, waterproofing performance, installation flexibility, material quality, and long-term maintenance needs. Readers will also learn how to hide wires for surface mounted fiberglass pool lights by using concealed channels, protective conduits, rear-entry fittings, or carefully planned cable paths that keep wiring secure without damaging the pool shell.
The article further examines common materials such as corrosion-resistant metals, UV-stable plastics, waterproof seals, and insulated low-voltage cables. It outlines practical installation steps, including planning the light position, preparing the mounting surface, routing and protecting the cable, sealing connection points, and testing the system before use. Finally, it highlights the importance of electrical compatibility, proper waterproofing, grounding, professional installation where required, routine inspections, and timely replacement of worn seals or damaged cables.
