A dim underground driveway light can turn a familiar entrance into a place of uncertainty. The beam may look weak near the garage, flicker against wet concrete, or leave the edges of the ramp in shadow. Small changes matter. A dark corner can hide a curb, standing water, or a dropped object.
Before choosing a repair, identify what has changed. A dirty lens, aging LED driver, loose connection, failing photocell, or moisture inside the fixture can all reduce brightness. The U.S. Department of Energy’s Energy Saver guidance reports that LED bulbs use at least 75% less energy and last up to 25 times longer than incandescent bulbs. That comparison supports efficient replacement, but it does not mean every dim fixture needs a new lamp. Sometimes the fault is deeper. The Illuminating Engineering Society also provides professional guidance on lighting design and visual conditions; safe visibility depends on more than brightness alone.
This guide explores seven practical ways to diagnose and improve a weak driveway light, from cleaning and checking the power supply to inspecting controls and considering replacement. It also explains when a simple fix may not be enough. Do not guess around damaged wiring. A qualified electrician can assess faults in wet, enclosed, or hard-to-reach installations. It is easy to blame the bulb. That can be wrong. If you are searching for how to fix a dim underground driveway light, start with the symptoms, the fixture’s condition, and the safest next step.
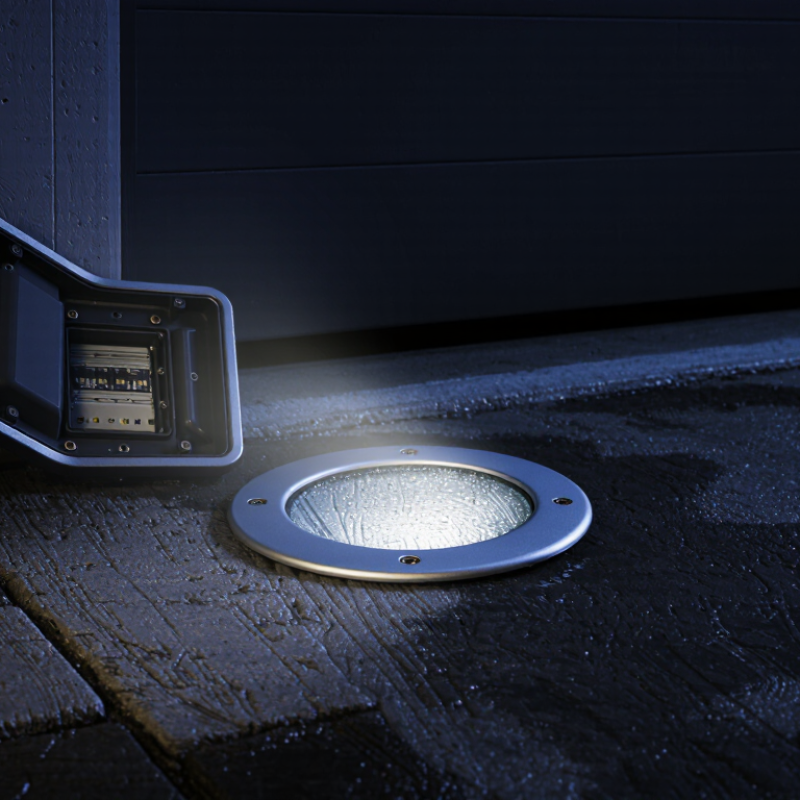
A dim underground driveway light is a symptom, not a diagnosis. Check whether one fixture is weak or the whole row has faded. One dim light may point to a failing LED driver, a dirty lens, or moisture inside the fitting. If several lights dim together, inspect the shared power supply, timer, or wiring. A cloudy cover can scatter light across the pavement, especially after rain. Small detail, big difference.
The U.S. Department of Energy’s Energy Saver guidance says LEDs use at least 75% less energy and can last up to 25 times longer than incandescent lights. That does not mean every dim LED needs replacing. Heat, water ingress, loose connections, and incompatible controls can still reduce output. A quick visual check helps, but buried wiring is not easy to assess from the surface.
Tips: Check one fixture first. Wipe its lens and look for condensation, corrosion, or a cracked seal. Compare its brightness with a working fixture of the same type. If the whole circuit flickers, smells hot, or trips a breaker, stop troubleshooting and call a qualified electrician. Do not guess. A wet underground fitting can make a minor fault harder to spot.
A dim underground driveway light may be losing power before it reaches the lamp. Start outside. Check whether nearby lights or outlets have also gone dark, then inspect the breaker and any ground-fault circuit interrupter (GFCI) reset button. A tripped GFCI can cut power to downstream fixtures. Reset it once; if it trips again, stop. Moisture, damaged insulation, or a wiring fault may be involved.
Look for moisture. Do not open a buried junction box or touch exposed wiring.
At the wall switch, note looseness, warmth, buzzing, or discoloration. These are warning signs, not a diagnosis. With power off at the breaker, a qualified electrician can test the switch and measure voltage at the fixture. A corroded connector or failing driver can also cause dim light. I might blame the bulb too quickly, but that can overlook the supply.
The U.S. Department of Energy reports that LEDs use at least 75% less energy and last up to 25 times longer than incandescent bulbs. That comparison makes bulb type worth checking, but it does not rule out a circuit problem.
If a known-good bulb stays dim, or the breaker trips repeatedly, leave the circuit off and contact a licensed electrician.
A dim underground driveway light may have a dirty lens, not a failing bulb. Dust, road grit, and dried splash marks scatter light and make the beam look weak.
Turn off the fixture at the breaker before cleaning it, and confirm it is not receiving power. Let the lens cool. Wipe away loose dirt with a soft, dry cloth, then use a damp cloth with a little mild soap. No harsh cleaners. Abrasive pads can scratch plastic or coated glass, leaving the lens hazy even after the dirt is gone.
Check the edges for mud, insect residue, and water droplets. Dry the lens completely with a clean cloth before restoring power. If the fixture has a removable cover, follow its instructions and avoid disturbing wires or seals.
I might be tempted to wipe quickly and move on, but moisture trapped behind the lens can keep the light dim.
If you see condensation inside, cracked seals, corrosion, or water that returns after cleaning, stop using the fixture and have a qualified electrician inspect it. A clean exterior helps, but it cannot fix a damaged seal or an electrical fault.
A dim underground driveway light may have a loose connection, damaged cable, or failing fixture. Switch off the circuit at the breaker before opening anything. Confirm the power is off with a suitable voltage tester; a wall switch alone is not enough. If the light sits in a damp well, wear dry gloves and keep water away from exposed wiring.
Check the connections for loose wire nuts, corrosion, or darkened insulation. Look closely. A small green or white deposit can signal moisture, while brittle insulation may indicate heat or age. Do not tug hard on buried cable. If a connection is wet, burned, or difficult to reach, stop and have a qualified electrician inspect it. I once assumed a weak light meant a bad bulb; the corroded connector was the real problem.
Inspect the fixture lens and housing for standing water, cracks, dirt, or a blocked drain opening. Clean the lens with a soft cloth and check that the lamp is seated correctly. Replace damaged seals with parts specified for the fixture’s location, not improvised tape. After reassembly, restore power and observe the light. If it still looks dim, compare its brightness with a similar fixture and note any flickering. That detail can help an electrician trace a voltage drop or hidden connection fault.
| Method | What to Check | Practical Fix | When to Get Help |
|---|---|---|---|
| 1. Clean the lens and fixture | Look for dirt, road film, moisture, clouding, or debris covering the lens or reflector. | Turn off power, then clean the lens with a soft cloth and mild soap. Replace a cracked, badly clouded, or water-damaged lens with a compatible part. | Get help if water is inside the fixture or the housing is damaged. |
| 2. Check the lamp and its rating | Confirm that the lamp is fully seated, functioning, and compatible with the fixture’s voltage and maximum wattage. | With power off, reseat or replace the lamp with one that matches the fixture specifications. Do not exceed the stated wattage or use an incompatible lamp type. | Seek advice if the correct replacement still appears dim or the socket looks burned or corroded. |
| 3. Inspect accessible connections | Look for loose, corroded, or moisture-exposed connections at accessible junctions and low-voltage cable connectors. | Switch off the system before inspection. Replace damaged connectors with outdoor-rated, moisture-resistant connectors suitable for the system. | Have a qualified electrician inspect buried or inaccessible connections, especially on line-voltage circuits. |
| 4. Look for damaged or corroded wiring | Check accessible cable for cuts, crushed sections, exposed conductors, or corrosion near the fixture and connection points. | Keep the circuit off if wiring is damaged. Have the affected cable repaired using methods and materials rated for its location and voltage. | Use a qualified electrician for damaged line-voltage wiring or any repair requiring excavation or electrical testing. |
| 5. Check voltage drop on low-voltage systems | If several lights are dim, consider whether long cable runs, undersized cable, or too many fixtures on a run may be contributing. | Ask an electrician or lighting professional to measure voltage at the transformer and fixture, then assess the circuit layout and cable sizing. | Get professional help before changing wiring, transformer settings, or circuit configuration. |
| 6. Inspect the transformer or power supply | For a low-voltage system, check whether the supply is on and whether its output matches the system’s specifications. Note whether multiple lights are dim or flickering. | Verify the timer or photocell settings and have the output tested with suitable equipment. Replace a faulty supply only with a correctly rated unit. | Use a qualified electrician for testing or repairs involving mains-voltage equipment. |
| 7. Check fixture condition and positioning | Inspect for loose mounting, a misaligned light source, corrosion, cracked seals, or a fixture partly covered by soil, gravel, or plants. | Clear obstructions and secure or reposition the fixture as its design allows. Replace a fixture that has failed seals, severe corrosion, or persistent internal moisture. | Get professional help if the fixture is hardwired, buried, or cannot be safely isolated from power. |
Safety: Turn off the appropriate power source before opening or handling a fixture. Do not touch exposed conductors or work on energized wiring. For line-voltage systems, damaged wiring, or uncertain connections, contact a qualified electrician.
A dim underground driveway light does not always need a full replacement. Start with the bulb. Turn off power, let the fixture cool, and check for a darkened bulb, dust, or moisture behind the lens. Replace it with a compatible bulb that matches the fixture’s voltage and enclosure rating. Compare lumens, not just watts; a low-energy bulb can still produce too little light for a sloped or shadowed driveway.
If a new bulb barely helps, clean the lens and inspect the fixture for corrosion or water marks. Persistent flickering or uneven brightness may point to a failing driver or wiring issue, not a weak bulb. Leave electrical repairs to a qualified electrician. I’d resist the temptation to install the brightest bulb available; glare can make the driveway harder to judge.
An upgrade may work better when the existing lights leave dark gaps. Choose outdoor-rated fixtures designed for damp or wet locations, and aim light toward the driving surface rather than drivers’ eyes. Spacing matters. A motion sensor or timer can improve visibility without leaving lights on all night. Test the result after dark from the driveway entrance; the first layout may still leave one awkward shadow near a wall or turn.
Dust, road grit, dried splash marks, or moisture on the lens can scatter light. A weak bulb is only one possible cause.
Turn off power at the breaker and let the fixture cool. Wipe loose dirt with a soft, dry cloth, then use a damp cloth with mild soap.
Avoid harsh cleaners and abrasive pads. They can scratch plastic or coated glass and leave the lens hazy.
Stop using the fixture if moisture returns, or if you see cracked seals or corrosion. Have a qualified electrician inspect it.
Match the fixture’s voltage and enclosure rating. Compare lumens, too; a low-energy bulb may still be too dim for a sloped or shadowed driveway.
Clean the lens and look for water marks or corrosion. Flickering or uneven brightness may point to a wiring or driver issue, so ask a qualified electrician.
Not necessarily. Excessive glare can make the driveway harder to judge, especially near turns or slopes.
Consider outdoor-rated fixtures for damp or wet locations when dark gaps remain. Aim light at the driving surface, then check for shadows after dark.
Yes. Either can provide light when needed without keeping fixtures on all night. Test the layout from the driveway entrance; one shadow may remain.
A dim underground driveway light can make parking and walking less safe, but the problem is often straightforward to diagnose. Start by identifying whether the light is consistently weak or flickers, and consider possible causes such as a failing bulb, dirt, moisture, or an electrical issue. Check that the power supply is working, the switch is on, and the circuit has not tripped. Turn off the power before inspecting or cleaning the fixture.
Clean the lens and remove accumulated dirt or moisture, then examine the wiring, connections, and fixture for visible damage or loose parts. If the bulb is worn out, replace it with a suitable option; if the light remains dim, consider upgrading the lighting system for clearer, more reliable illumination. These steps offer a practical guide on how to fix a dim underground driveway light while helping you decide when a qualified electrician may be needed.
