Replacing a tired halogen pool light with LED lighting can improve visibility, reduce energy use, and refresh an older pool without rebuilding its entire lighting system. Yet how to replace an old halogen pool light with led is not simply a matter of removing one bulb and installing another. Water, electricity, heat, and aging seals create risks that deserve careful attention.
Pool-design expert Scott Cohen has emphasized, “Safety should never be an afterthought around water.” That principle matters here. Before touching the fixture, switch off the correct circuit breaker and verify that power is absent. Do not trust a wall switch alone. Check the fixture voltage, lamp size, niche type, transformer rating, and LED manufacturer instructions. Some LED replacements fit existing wet niches. Others require a compatible housing or transformer.
A clean towel, a new lens gasket, and corrosion-resistant screws can prevent small problems later. Open the fixture carefully. Look for cloudy water, cracked glass, brittle wiring, or rust around the niche. These details tell a story. An old gasket may look usable, but compression damage can remain hidden. Replace it when recommended.
The cable should stay dry and undamaged. The fixture must be secured correctly before testing. If the light uses unfamiliar wiring, a damaged junction, or a nonstandard transformer, stop and contact a licensed pool electrician. That step may feel excessive. It is not.
LED lights can be efficient, colorful, and long-lasting. Still, “easy replacement” is sometimes an optimistic phrase. Careful inspection matters more than speed. Done properly, the upgrade can produce a brighter pool, calmer maintenance, and fewer unpleasant surprises after sunset.
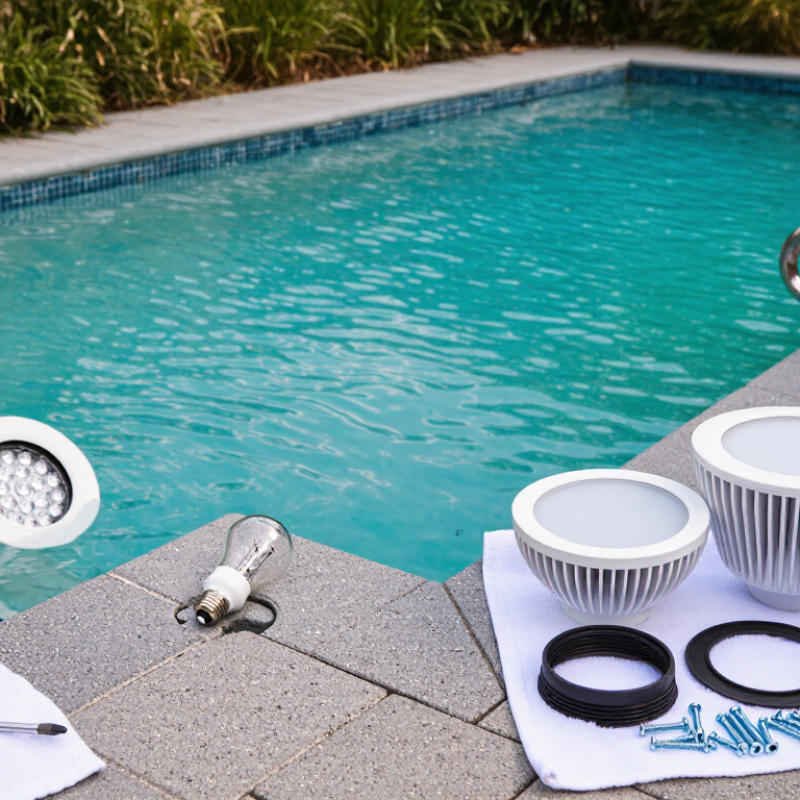
How to Replace an Old Halogen Pool Light With LED?
Replacing a halogen pool light is not only a bulb change. Verify the circuit voltage before opening the fixture. Older pool lights may use 12, 24, or 120 volts. An LED replacement must match the supply voltage and current type, such as AC or DC. A mismatched lamp can flicker, overheat, or fail early. Turn off the breaker, lock it when possible, and confirm the circuit is dead with a suitable tester. Water and electricity leave little room for guessing.
Measure the existing niche carefully. Record its diameter, depth, screw spacing, gasket position, and cable length. The new housing must sit firmly against the niche without pinching the gasket. Check whether the cable reaches the junction box without tension. A light that fits the opening may still fail because its rear housing is too deep. I have seen replacements look correct from the pool deck but press unevenly against the seal. Small measurements matter.
Confirm UL 676 compliance for the complete underwater fixture, not merely the LED lamp. Look for permanent certification markings and installation instructions covering wet-niche use, grounding, bonding, and sealing. Do not rely on a generic bulb inside an old enclosure unless the manufacturer permits that configuration. A qualified pool electrician should inspect the niche, bonding conductor, transformer, and junction box. My own checklist once missed a corroded bonding connection. That mistake reinforced a practical rule: inspect every connection, even when the light appears to be the only problem.
| Verification Dimension | Typical Existing Halogen Setup | LED Replacement Requirement | How to Verify | Replacement Decision |
|---|---|---|---|---|
| Supply voltage | Common systems use low voltage, such as 12 V, or line voltage, such as 120 V. The actual value varies by installation. | The LED lamp or fixture must be rated for the same voltage and electrical system. A 12 V LED cannot be connected directly to a 120 V circuit. | Switch off the circuit, identify the transformer or junction-box labeling, and have a qualified electrician measure the circuit voltage. | Proceed only when voltage ratings match. |
| AC/DC compatibility | Older pool-light transformers may provide low-voltage AC rather than DC. | The LED replacement must accept the actual output type: AC, DC, or a stated AC/DC range. | Read the transformer output label and the LED product label. Do not assume that “12 V” identifies the current type. | Do not install if the current type is incompatible. |
| Niche diameter and depth | The existing wet niche may have a specific inside diameter, depth, screw pattern, and cable-entry position. | The replacement housing must fit fully inside the niche without forcing the lens, cord, gasket, or retaining hardware. | Remove the light from the waterline area only as permitted by the installation instructions. Measure the niche opening and compare it with the LED manufacturer’s dimensional drawing. | Use a listed retrofit or fixture confirmed for the measured niche. |
| Mounting hardware | Many underwater lights use a retaining screw, bracket, or face-ring arrangement specific to the niche. | The LED unit must use compatible hardware and maintain secure mechanical retention. | Compare screw location, thread type, bracket position, and face-ring dimensions. Never drill or modify the niche unless the instructions and applicable code permit it. | Stop if the unit cannot be secured exactly as specified. |
| Cable and cord condition | The existing underwater cord may be aged, cracked, stiff, spliced, or incorrectly routed through the conduit. | The cord, sealing system, and connection method must be approved for the fixture and remain undamaged. | Inspect visible cable insulation and the cord seal. Do not reuse damaged cable or make underwater splices. | Replace the complete listed assembly when the cord or seal is damaged. |
| GFCI protection | Pool-light circuits require ground-fault protection under applicable electrical rules. | The LED replacement must remain connected to a correctly installed and tested GFCI-protected circuit. | Test the GFCI test and reset functions before work and after installation. A qualified electrician should verify protection and wiring. | Do not energize a pool-light circuit without verified GFCI protection. |
| Grounding and bonding | The niche, junction box, and associated metallic parts may be part of the pool bonding system. | The replacement must preserve the required grounding and bonding arrangement; low-voltage operation does not eliminate these requirements. | Have a qualified electrician verify the grounding conductor, bonding connection, junction box, and conduit arrangement. | Do not proceed if grounding or bonding is uncertain. |
| UL 676 compliance | A legacy fixture may have an older certification marking or may no longer have a readable label. | Choose an underwater swimming-pool or spa luminaire listed and marked for the intended application, with certification to UL 676 where required. | Check the permanent product label, installation instructions, certification file information, voltage, location rating, and required niche compatibility. | Accept only a properly listed, labeled, and installation-compatible product. |
| Wet-location sealing | Heat, chlorine, and repeated servicing can harden or deform lenses, gaskets, and seals. | All lens gaskets, O-rings, screws, and sealing surfaces must be installed according to the instructions and remain watertight. | Inspect sealing surfaces, use only specified replacement parts, tighten hardware evenly, and perform the manufacturer-required leak or operational checks. | Replace deteriorated sealing components before energizing. |
| Transformer capacity | The transformer may already supply other low-voltage pool equipment or multiple lights. | The total connected load must remain within the transformer’s rated output, and the LED must operate correctly with its output characteristics. | Add the wattage of all connected loads and compare it with the transformer rating. Confirm compatibility with the LED instructions. | Proceed only with adequate capacity and compatible output. |
| Light color and control | Halogen lights generally provide a warm white appearance and simple on/off switching. | LED units may offer fixed white light or color-changing modes that require compatible switching or control signals. | Confirm the desired color temperature, mode-control method, switching sequence, and compatibility with existing controls. | Select the control method before purchasing the replacement. |
| Final inspection and testing | An old lamp may operate while still having unsafe wiring, damaged seals, or poor mounting. | The installed fixture must be mechanically secure, correctly wired, dry internally, and operational without nuisance tripping. | Restore power only after the work is complete, test GFCI operation, inspect for abnormal heating or flicker, and follow local inspection requirements. | Document the checks and have electrical work inspected when required. |
Halogen lamps usually produce 15–25 lumens per watt. LEDs commonly produce 80–100 lumens per watt.
Turn off the circuit breaker and lock it out. Confirm zero voltage with a suitable tester.
Match the voltage, socket type, housing design, and connection requirements.
A damaged gasket can let moisture enter the housing. The problem may appear weeks later.
Yes. Take a clear photograph before disconnecting anything.
Aim the beam slightly downward instead of directly toward swimmers’ eyes.
No. LEDs produce less heat than halogen lamps, but the driver and connection points still warm up.
Stop using the light and investigate the installation. Repeated tripping may indicate moisture, damaged insulation, or incorrect wiring.
Its optics may direct more light toward the pool floor, walls, and steps. Wattage alone does not show brightness.
Replacing an old halogen pool light with an LED model can improve energy efficiency, brightness, and service life when the installation is planned carefully. Before starting, verify the existing voltage, confirm that the new fixture fits the pool niche, and check that it meets applicable underwater-lighting safety requirements, such as UL 676 compliance. LED lights typically produce about 80–100 lumens per watt, compared with approximately 15–25 lumens per watt for halogen lighting.
To learn how to replace an old halogen pool light with led, first switch off the correct GFCI-protected circuit and confirm that the power is completely disconnected. Remove the old fixture carefully, inspect the wiring, and install the 12-volt LED light with a new gasket and properly seated IP68 sealing components. After installation, test polarity, aim the beam, restore power, and verify GFCI protection. The light should operate steadily without flickering, water entry, or excessive heat. If wiring, sealing, or voltage is uncertain, have the work checked by a qualified professional.

